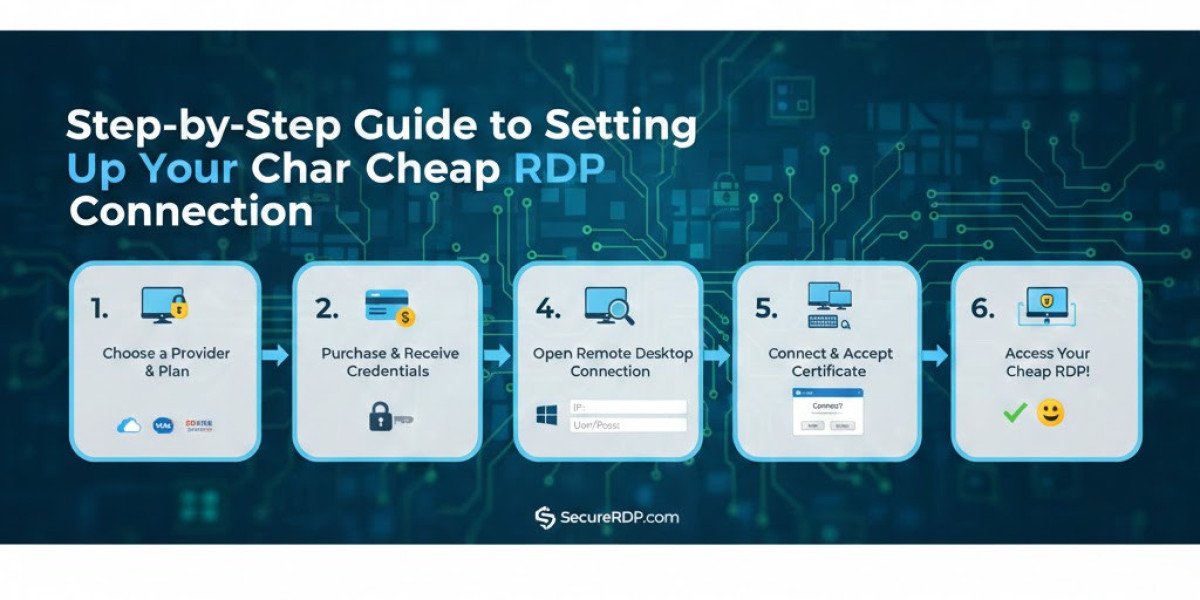
In today’s fast-paced digital world, having reliable remote access to your computer is crucial. Remote Desktop Protocol (RDP) allows users to connect to another computer over the internet, enabling seamless work from anywhere. If you’re looking for a cost-effective solution, a Cheap RDP plan can provide powerful performance without breaking the bank. This guide will walk you through the process of setting up your RDP connection efficiently, whether you are a beginner or an experienced user.
What is RDP and Why You Need It
RDP is a proprietary protocol developed by Microsoft that provides a graphical interface to connect to another computer. Instead of physically being at your workstation, you can access files, run applications, and perform administrative tasks remotely.
Benefits of using RDP include:
Convenience: Work from any location with internet access.
Security: Encrypted connections ensure your data is protected.
Cost-effectiveness: Saves money on hardware and office space.
Investing in a cheap RDP plan doesn’t mean compromising on performance. With the right setup, you can enjoy a stable and secure connection at a fraction of the cost.
Preparing for RDP Setup
Before you jump into the setup, there are a few steps you need to take:
Check System Requirements
Ensure your computer meets the necessary requirements:
Windows OS (Windows 10, 11, or server editions)
Sufficient RAM and storage to handle remote sessions
Stable internet connection
Choose the Right RDP Plan
When opting for a cheap RDP, consider the following:
RAM and CPU: Ensure it can handle your tasks smoothly.
Bandwidth: High-speed connectivity avoids lag during work.
Operating System: Choose Windows Server for business tasks or standard Windows editions for personal use.
Once you select a suitable plan, you will receive login credentials including the server IP, username, and password.
Step 1: Enable Remote Desktop on Your Computer
Before connecting, you need to enable RDP on your host machine:
Open Settings and navigate to System → Remote Desktop.
Toggle Enable Remote Desktop to "On."
Confirm any firewall prompts that appear.
Note your computer’s name as you will need it to establish a connection.
This ensures your device is ready to accept incoming RDP connections securely.
Step 2: Set Up Your RDP Client
You will need an RDP client to connect to your remote server. Most Windows systems come with Remote Desktop Connection pre-installed, but you can also use third-party clients for better features.
Using Windows Remote Desktop Client
Open Remote Desktop Connection from the Start menu.
Enter the IP address of your RDP server.
Click Connect and input the username and password provided by your RDP provider.
Choose display settings and resources if needed, such as local drives or printers.
Click OK to establish the connection.
For Mac or Linux Users
RDP clients like Microsoft Remote Desktop for Mac or Remmina for Linux provide the same functionality. Installation is straightforward and usually involves entering the same credentials.
Step 3: Secure Your Connection
Security is vital when accessing a remote server. Follow these steps to protect your data:
Use strong passwords: Avoid default or easily guessable passwords.
Enable Network Level Authentication (NLA): Adds an extra layer of security.
Use VPN if possible: Encrypts your internet traffic for added safety.
Keep software updated: Ensure both your client and server OS are patched regularly.
A secure RDP environment prevents unauthorized access and protects sensitive information.
Step 4: Optimize RDP Performance
Even with a cheap RDP plan, performance can be optimized:
Adjust visual settings: Lowering color depth or disabling unnecessary animations improves speed.
Close background applications: Free up CPU and memory for smoother performance.
Select proper bandwidth options: Most RDP clients allow you to choose connection speed to match your internet.
With these tweaks, even budget RDP plans can perform efficiently for work or personal use.
Step 5: Troubleshooting Common Issues
Sometimes, problems may arise. Here’s how to address them:
Connection refused: Check firewall settings and ensure Remote Desktop is enabled.
Slow performance: Reduce display quality and close other applications.
Authentication errors: Double-check your username and password, and ensure NLA is enabled.
Most issues are easily resolved by verifying your settings and credentials.
Step 6: Advanced Tips for Experts
For those who want to maximize their RDP experience:
Map local drives and printers: Seamlessly access files or print remotely.
Multiple sessions: Some RDP plans allow concurrent connections for multitasking.
Automated backups: Use your RDP server for data storage with scheduled backups.
These advanced setups provide more flexibility and efficiency, especially for professional or business use.
Why Cheap RDP is Worth Considering
Opting for a cheap RDP plan allows you to access professional-grade remote services without high costs. It is ideal for freelancers, small businesses, and students who need reliable computing power remotely. The convenience, security, and cost savings make it a smart choice for anyone seeking remote desktop solutions.
Final Thoughts
Setting up your cheap RDP connection doesn’t have to be complicated. By following these steps—preparing your system, configuring your client, securing your connection, and optimizing performance—you can enjoy a seamless remote desktop experience. Remember, the key is to maintain security and choose a plan that meets your needs.
Take the leap into remote computing today and unlock the power of working from anywhere with a simple, affordable RDP solution.