
When a Helldivers 2 achievement demands unusual damage mechanics, preparation can make the process much easier. While Helldivers 2 Super Credits are useful for accessing cosmetic and progression-related options, the hidden “That Which Does Not Kill You...” trophy is earned through a completely different challenge. The objective is to injure all four limbs simultaneously without dying immediately, making careful equipment selection and positioning more important than raw firepower.
Prepare the Right Loadout
The most reliable setup centers on armor carrying the Democracy Protects passive. This ability gives you a 50% chance to survive otherwise lethal damage with only 1 HP remaining. The DP-40 Hero of the Federation is a good example, but any armor with the same passive can serve the purpose.
Before entering the mission, check your booster selection carefully. Vitality Enhancement should not be equipped because its effects can interfere with limb injuries. If teammates are joining the mission, they should avoid using that booster as well. Removing this potential complication gives the damage mechanics a better chance of working as intended.
Start With a Simple Mission
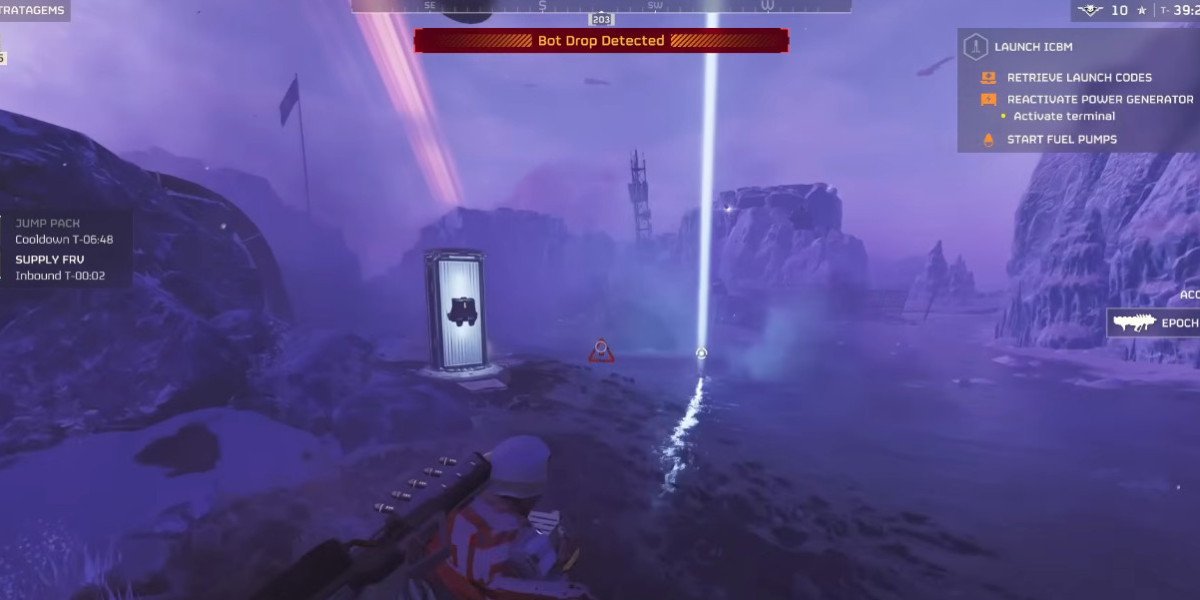
A solo Trivial mission is ideal for this particular challenge. Lower difficulty means fewer enemies and less pressure while you prepare the setup. Once your Hellpod lands, select a blue stratagem that arrives through another Hellpod. Resupply equipment or similar support items can work well because the incoming pod provides the impact needed for the technique.
After activating the stratagem, pay close attention to the landing beacon. Do not move around unnecessarily while waiting for the pod. The goal is to establish a precise position underneath its projected landing point.
Position Yourself Correctly
Stand directly beneath the incoming Hellpod and use the beacon as your visual guide. A useful alignment technique is to position yourself so the blue beacon light appears directly behind your character's head or neck. This helps keep your body centered under the descending pod.
As the impact gets closer, crouch or move into a prone position. The timing does not need to be perfect every time, but remaining beneath the pod is essential. If your position is slightly off, the impact may kill you without producing the required four-limb injury.
Let the Impact Do the Work
The unusual part of this method is how the game's impact calculations can occur. A Hellpod may appear to kill your character instantly, yet the limb damage can register immediately before the death animation completes. When the setup works correctly, all four limbs can be fractured at essentially the same moment, satisfying the achievement requirement.
Do not worry if the first attempt fails. The method is easy to repeat because the mission setup is straightforward. After being reinforced, call another appropriate stratagem and make another attempt. Small adjustments to your position can make a significant difference.
Try the Charger Technique
Players who prefer an enemy-based method can use a Charger. Head to a Terminid planet on medium difficulty and look for a suitable rock wall or another solid surface. Position yourself directly between the Charger and the obstacle, then allow the creature to charge toward you.
The force of the Charger hitting both your character and the wall can cause extensive blunt damage. Under the right circumstances, the collision may fracture all four limbs. However, this method relies more heavily on enemy movement and environmental collision physics, so it may take several attempts.
Keep Explosive Options as a Backup
The Eagle 500kg Bomb is another possible solution. Equip Democracy Protects armor and place the bomb close to your character. Its powerful single burst can potentially trigger the survival passive while the resulting force damages your limbs.
Older strategies involving ordinary grenades or standard airstrikes are less dependable following changes to explosive and armor interactions. For that reason, the Hellpod technique remains a practical first choice, while the Charger and 500kg Bomb approaches work well as alternatives.
Once the trophy is unlocked, you can return to ordinary missions and focus on collecting resources and improving your equipment. For players looking to strengthen their overall progression, Helldivers 2 Samples for sale can also be considered as part of a broader preparation strategy, while the achievement itself depends mainly on precise positioning, suitable armor, and patience.